Public Xervice Announcement
Posted by C.Brutail on January 21, 2012
We’ve got some really important informations for mappers, please pay attention and spread the news! Over the past month or so, quite a lot of things have happened which concern mappers, and we just want to highlight the most important things for you guys so you understand the changes and can work with them in the future.
 Map picture entities: info_autoscreenshot
We’ve been contemplating for a long time a way for map screenshots to be done easier for the mappers and developers in a way that streamlines the process in the future and keeps the screenshots consistent and clean, so divVerent recently implement this. Basically, the way it works is by placing an entity on the map which contains an origin and view angle, and then the autobuild system (or maybe other parts of the game, like intermission perhaps in the future) will save the screenshot at that exact position.
There are basically 3 ways you can do this easily:
- Use a
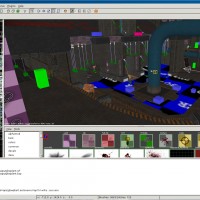
target_positionentity together with aninfo_autoscreenshotentity which only needs origins. This method is best for netradiant, simply because you can create the mapshot without much effort at all, all you need to do is position the entities how you want and link them together with Ctrl + K. - Place the
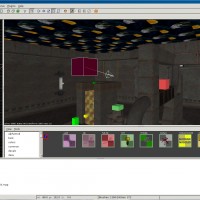
info_autoscreenshotentity, and then rotate it manually in netradiant to how you want it by using the rotate tool. - Use_ r_speeds _to get your desired origin and angles, and then manually create the entity with a text editor.
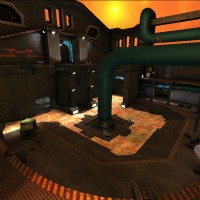
You can see examples and the results of these on maps already in the game as of today, “glowplant” uses the first method
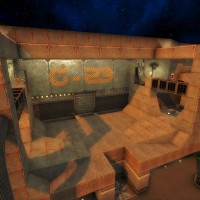
 and “g-23” uses the second.
If the map is on the autobuild server, it will automatically make you screenshots using these map entities (up to 3 entities can be used at once). The screenshots are at 1024x1024 resolution, but you need to resize them manually to 512x512 to use them as the mapshot. Unfortunately, the autobuild system cannot automatically pack the map shots into the pk3s as the screenshots are done after compilation/building, so you will still need to handle that yourself as well.
 New NetRadiant build: sRGB lighting
A new lighting method has been in the works for a bit now by divVerent, which basically uses more realistic color and shading calculations for the lightmaps created by q3map2 (you could already read about this in WoX-Blox #1). It can in many cases be a major improvement to lighting on maps, and especially it helps with maps being too dark in some cases. Of course the mapper still has full control over lighting and can still make the map dark, BUT it needs to be pointed out that sRGB lighting is by default about 2.2 times brighter than normal lighting methods! Because of this, it cannot be simply “slapped” on to a map, unless you adjust the light radius and intensities appropriately.
You can use various light flags to scale/adjust to compensate for this extra brightness, generally a factor of 0.4 or 0.5 would make the lighting look similar to the old style lightmaps.
Additionally, we have also produced a new build of NetRadiant for Windows users which has a few more features/tweaks/fixes since the last one, plus this new sRGB support enabled by default. (NOTE: Linux and OS X users have to compile it themselves using the git system, those platforms are impossible to build for different architectures normally) If you use this build version OR your map is on the autobuild server and you want your maps lighting to remain the same, you MUST use the “-nosRGB” flag! Otherwise, the lighting will default to sRGB, and that may be too bright for your map.
sRGB lighting for maps is certainly better when used properly, and it’s the direction we want to go in the future, and we expect all default maps (and all new ones) to eventually switch to sRGB lighting. Currently the most notable ones that use it are: Drain, Courtfun, g-23, and Darkzone.
 Bot waypoint editor: Automatic waypointing
Finally just a quick one about a feature we added to the waypoint editor. In addition to its old functionality, the waypoint editor can now automatically map the waypoints based on YOUR movement. Using the waypoint editor normally, enable g_waypointeditor_auto and just walk around all the various paths of the map. Once all paths are plotted, you will see a very natural plot which generally is far easier and much better than manually creating all of the plots. Depending on map size, it usually takes 5 minutes or so of just walking everywhere you can. Note that you should WALK slowly as bunnyhopping can distort the paths for bots.
Thank you for your attention, and again, please spread the news! If you have any question or just would like to comment this news, state them at the original announcement at the Xonotic forum!
Xonotic is a fast paced first person shooter where
crisp movement, nuanced weapons, and in-your-face action
combine to create addictive arena-style gameplay.
Xonotic is free to play and modify under the
copyleft
GPLv3+ license.
Download it today!


