Halogene's Newbie Corner
 Contents
 Preface
This guide aims to show all fundamental aspects of vanilla Xonotic gameplay to enable new players to pick up the ropes quickly. It is designed to complement the in-game guide, offering an additional resource for those beginning their journey.
Note that while movement aspects usually apply more or less unchanged to modified servers offering InstaGib, vehicle CTF, or Overkill gameplay, I will not explain the specifics of these game mutators/rulesets – I simply lack the expertise in non-vanilla game modes. The XDF ruleset has different physics and a separate video-guide called XDF Academy. If you want to fully apply the knowledge gained from this guide, search for vanilla servers under the “Normal” category in the server browser.
Remember that the Xonotic player community is generally considered a very friendly and helpful one and for many people (including myself) this is the key aspect that gets one hooked to this game. If you meet very strong players online and wonder how they do certain things, it usually pays off to simply ask them. Most of the experienced players will take their time to quickly explain gameplay techniques to newbies if asked nicely. Some of them might even offer to show you around by giving you a short live tutorial. That’s how I myself learned about Blaster jumping and strafe turning for example.
Even if the skill gap between you and another player is immense, it is highly improbable that the other player is cheating. There are a couple of mechanisms implemented in the game that effectively prevent cheating, and from my personal experience I am confident to say that cheating is not really an issue in Xonotic. The skill gap between newbies and experienced players mostly results from newbies not knowing gameplay mechanics and therefore lacking the ability to acquire skill in the first place. The purpose of this Newbie Corner is to allow any new player to develop the same skills that experienced players have already gained, simply by showing how it works.
 Movement
Even though people tend to be more interested in what the weapons do when they first try out a new first person shooter, I prefer to follow the structure that I established for my live newbie tutorials and to start off with the movement. Understanding and mastering Xonotic’s movement is a key success factor in this game, apart from making it incredibly fun to play once you get the hang of it. So let’s get started!
 Bunny Hopping
You may have noticed that players race around the maps at insane speeds, making them hard to hit and also hard to tell from which direction they’ll come next, should you survive an attack. You can do that too, and here’s how.
In Xonotic you have a lot of movement control while you are in the air (“air control”), and to a great extent you’ll accelerate when pressing the forward button while flying. When you just walk around though, your feet are in constant contact with the ground, so the friction is slowing you down a lot. One of the keys to gain high speeds in Xonotic is therefore to touch the ground as little as possible. By constantly jumping (“bunny hopping”) you can keep ground contact to a minimum. The good thing is that you only need to keep the jump button pressed and you will jump again once you hit the ground (unless of course you disabled that in Settings → Input). If you press the forward button while holding the jump button, you’ll continuously get faster until you hit the acceleration limit.
This is quite easy and there’s nothing really to master about plain forward bunny hopping. However, you’ll face complications if you now try to turn once you gained some speed. If you continue to hold the forward key and simply turn the mouse, you’ll hardly manage to make a sharp turn (unless you stop jumping, which slows you down a lot). In order to perform sharper turns without loosing speed, thus making you more agile, do the following:
Before the turn, while still bunny hopping, release the forward key. Once you’ve released the forward key (while still keeping the jump key pressed), hold down the strafe key in the direction you want to turn (for sharp right turn: strafe right). Keep holding the jump key and the strafe key then smoothly and steadily turn your mouse into the strafe direction (in my example, right). It’s vital to move the mouse smoothly, because any abrupt sudden movements will slow you down. I can’t stress this aspect enough – a lot of newcomers that I told this technique basically got all the key pressing parts right but failed at moving the mouse smoothly. Softly accelerate and decelerate the mouse turn and maintain a steady turn speed in between. The movement needs to be fluent and soft to get the full benefit. Also note that releasing the forward key while you’ve already pressed the strafe key will slow you down too, so be sure to use the right order. You’ll notice that if you do it right, you actually don’t lose speed in turns, but rather start to accelerate! This technique is called “strafe turning.”
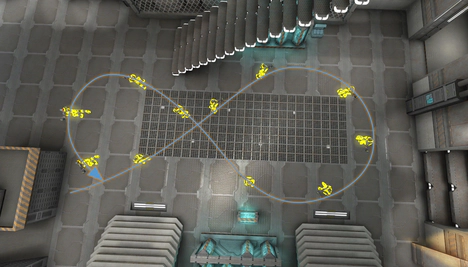
Once you’re done turning, you can release the strafe key and press the forward key again or even directly switch to the other direction. A good way to practice this is to use forward only for inital acceleration, and then to do turns left and right running in an figure eight shape (I recommend the main room in the map Afterslime for that).
It takes a while to get used to, but if you practice it, this goes into your cerebellum sooner or later (depending on your age, mostly) and then you’ll never think about it again! At that point you’ll be bunny hopping all over the place at high speed. Mastering this technique is very rewarding, since running around a map at high speed is a bunch of fun.
Beyond this, advanced techniques known from other games as “strafe jumping” and “circle jumping” can also be used, however their impact is limited in vanilla gameplay.
Strafe jumping is about gaining additional speed when bunny hopping forward. Essentially you hold forward + strafe and point a bit into the strafe direction while bunny hopping, and you constantly increase the angle slowly. When strafe jumping for distances longer than 4 or 5 hops, you will have to switch the strafe (and turn) direction as your path gradually bends into the strafe direction, so you can continue to hop in a straight line.
Circle jumping on the other hand is a technique used to gain extra speed out of the stand. It works only when you walk on the floor, so it’s mainly used to gain a little extra speed before your first jump. That way of course you can reach farther distances with your first jump, as seen in Smilecythe’s video about the Mega Armor jumps on HUB. For circle jumping, you utilize a mechanic that increases your walking speed beyond the maximum speed you can gain by pressing plain forward. If you have the speedometer enabled, you will see that you can gain more than 500qu/s if you press forward, strafe and turn in the strafe direction rather fast and steadily. So what people do is that they make a quick 90° or even 180° with only forward + strafe key pressed (no jumping), and then they start to bunny hop (and strafe jump). This way they can start off with a bit more speed than by just starting a bunny hop. This is why many experienced players start a bunny hop with that awkward swipe that looks like they try to swing their weapon at someone.
These are techniques which are essential for Xonotic race mode / CTS where servers use CPMA-like physics. In vanilla mode the effect of strafe jumping and circle jumping is limited, but sometimes they may tip the scales or allow for certain jumps. If you would like to obtain a better understanding of how strafe jumping works, check out Hero’s strafe jumping lesson. These techniques can be practiced best on the Xonotic Race/CTS servers, but I recommend to approach these servers as a platform for learning and training movement. Some maps are designed for people that have perfectionized the aforementioned movement techniques, so don’t let the maps discourage you. On half of the maps offered there I for example have a hard time even reaching the first checkpoint, let alone finishing it – but it’s excellent training as it provides direct feedback (=fail) if you use the technique right.
 Blaster Jumping
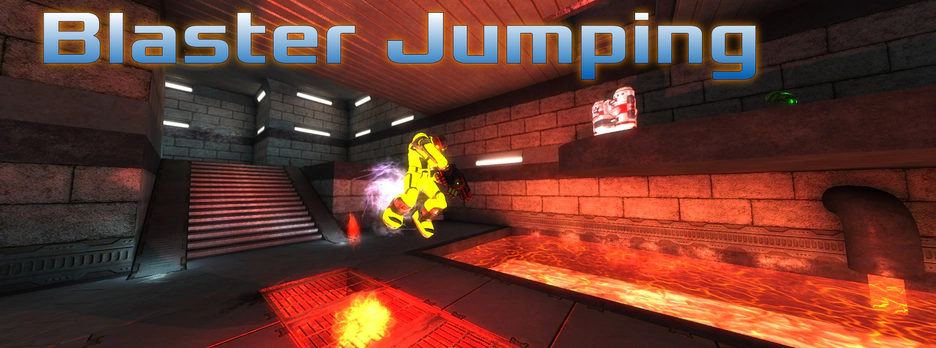
Let’s now have a look at two important aspects of a very useful movement tool in Xonotic, the Blaster! While dealing somewhat low damage, the Blaster is one of the most important weapons in Xonotic. Its projectile creates a blast upon impact on any surface or object that deals little damage to players nearby, but pushes such players away from the impact spot. That way, the push force of the Blaster projectile impact can be used to move both other players and yourself around. You can test this easily by standing and shooting at the ground below you with the Blaster. You’ll notice that you get pushed up into the air by the blast. Now if you jump at the same time, you can get pushed even higher. If you get the timing right, you can get very high, like from the upper platform to the roof or from the fan to Crylink on the map Xoylent.
But you’ll not always want to do very high jumps, for example if you’re on the run and need to hit a passageway without bumping your head on an arch above it (like the Mega Armor on Stormkeep coming from Hagar). In such cases, it can be useful to fire downwards while you are already (or still) in the air during bunny hopping, allowing the Blaster projectile to travel a short distance before impact and having more space between impact and yourself, so the push is not that strong.
You’ll have to experiment a bit with the timing of shooting and jumping to reliably achieve the desired jump height, but this will become muscle memory rather quickly since you’ll be using Blaster jumps a lot in Xonotic.
 Wall Blastering
Now, when accelerating fast, you won’t always want to do that vertically. Sometimes the first few bunny hops are not fast enough to reach a place (or to get out of a place) in time. With the technique of wall blastering you can easily reach rather high horizontal speeds instantly, out of the stand.
To master wall blastering, you’ll obviously need a wall. While it would seem logical to use a wall that you can Blaster off in a 90° angle with a Blaster shot backwards, it is at least equally effective and easier to use a wall that is parallel to your desired movement direction. For practicing this, you start off standing next to that wall and facing into the desired movement direction. Then you start a bunny hop by pressing foward and then the jump key. While in the air from your first jump, you flick around (to approximately 8 o’clock if the wall is left from you, 4 o’clock if the wall is right to you), and shoot the Blaster at the wall aiming slightly above your head. If you shoot parallel or even down a bit, you’ll get a high upwards boost, wasting energy into vertical acceleration, so be sure to aim a little bit upwards! After the flick shot turn back to your desired movement direction and contine to bunny hop. Do not release the jump key during the entire process.
Now let’s tweak this a little more. You wouldn’t want to accelerate into your viewing direction when looking backwards during the flick shot, would you? That is why you should switch for the time you are not looking in your desired movement direction from the forward key to the respective strafe key (strafe right if you turn to a wall on your left, strafe left if you turn to a wall on your right). When turning back into movement direction, keep the strafe key pressed until you can switch to forward key again. You can use a smoother mouse movement for turning back at least for the last couple of degrees in order to gain extra acceleration as explained in the Bunny Hopping section. Also remember to release the forward key before pressing the strafe key, and vice versa!
Once you’ve learned how to reliably accelerate out of the stand with this technique, you can also use it while already bunny hopping in order to gain extra horizontal speed. Just flick around when passing a wall to gain an extra boost. Note that the Blaster projectile always needs to travel a bit until it hits the wall. The faster you get, the less you need to turn backwards, since you’ll travel forwards while the projectile is on its way to the wall. At very high speeds you will even be able to shoot at 10 o’clock or 2 o’clock respectively, so you’re not even facing backwards any more! But most maps don’t allow for such fast movement. Experiment and learn at which speed to use what angle, and you’ll be a fast flag runner very soon!
 Ramp Jumping
Ramps are sloped surfaces that can be used for an extra upwards boost when doing a jump. If done properly, you can get to places you would not be able to reach without using a jump pad or the Blaster (see the section about blaster jumps), also without making any suspicious noises or losing any health. This makes ramp jumps especially useful in duels or 2v2 tdm matches and generally extends your movement options in all game modes. Ramp jumps are also very much fun to do!
In my “live” newbie tutorials, I always demonstrate the ramp jump on this spot on the map Xoylent, as it’s rather easy to master and you get the idea how it actually works:
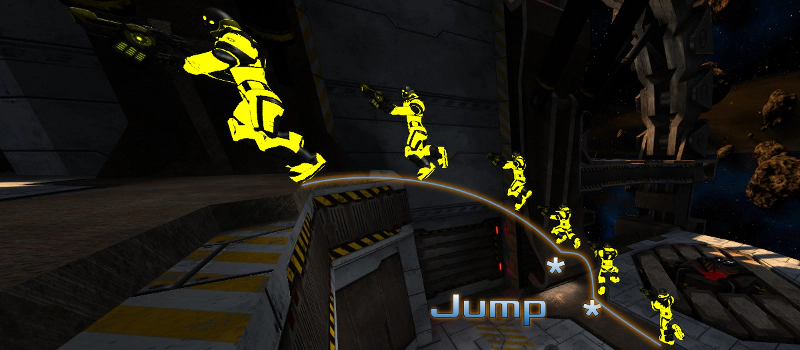
To do a ramp jump, you simply jump onto the sloped surface and jump again. Of course you can keep the jump button pressed for convenience, as with bunny hopping you will automatically jump again when hitting the sloped surface. Now this sounds awfully easy to do, and it wouldn’t be a proper challenge to master if that was all you got to do, would it? So let’s have a close look at the technical aspects behind it.
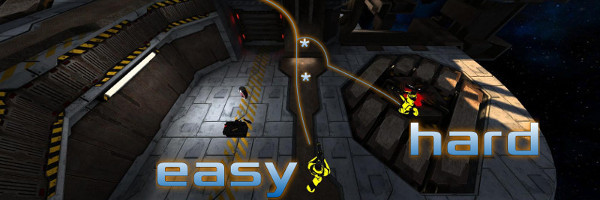
The easiest way to make a ramp jump boost you up high is to approach the ramp frontally (see figure below), not sideways or parallelly (unless of course you’re doing a strafe turn jump upwards the ramp, but hey this is a newbie guide!). See below what I mean with “approach the ramp frontally”:
Make sure that you hit the ramp at a flat angle (seen from the side, as in the image below). If possible, try to hit it when still going upwards from your previous jump. If you’re already on your way down from the previous jump when you hit the ramp, the angle at which you hit it will be steeper – if the angle is too steep or even 90° you’ll get slowed down and the ramp won’t give you the desired upwards boost.

The faster you are, the higher you will get. Ramp jumps that require a higher than walking speed to do are especially tricky, since you will need to bunny hop onto them and time your jumps so you hit the ramp at a good angle. In some cases, you’ll be able to ramp jump onto another ramp, which will result in a double ramp jump.
You will find ramps on a lot of maps, if you look for them. Now that I’ve shown you the mechanics behind ramp jumping, I’ll include some examples of ramp jumps in some of the stock maps for you to try out.
 Xoylent
-
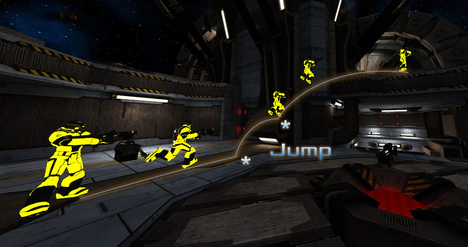
The ramp I showed as first example on Xoylent can also be used to get to the Vortex platform. It’s easier if you use the right corner of the ramp for this jump.
click to view full size -
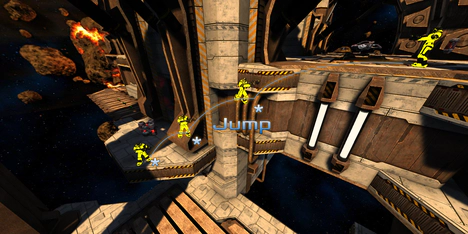
At the Mega Health you can do a double ramp jump up to Crylink, where the pipes serve as second ramp. Note that you don’t have to approach these ramps frontally as you can compensate the lower upwards boost by using the second ramp.
click to view full size -
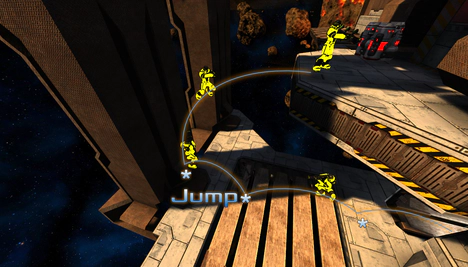
One of the most tricky ramp jumps I’m going to show you here is the one from the Devastator to the Mega Health. Unless you do a circle jump, this one is not possible to my knowledge to do with walking speed, so you’ll have to do a bunny hop onto the ramp. I always start between the Devastator’s spawn point and the wall behind it, starting a bunny hop and usually hitting the ramp at the right time then. You’ll have to experiment a bit and find the good starting point for you, then you can reproduce that jump and start to get a feeling how you can do it in-game on the fly, without needing to stop at your favorite starting point. When turning around after the ramp jump you can switch from the forward key to the appropriate strafe key in order to lose less speed, but it’s not required to perform that jump.
click to view full size
 Afterslime
-
On Afterslime you can walk up to the little barrel below the Mortar and jump just as you reach it, it will take you up to the Mortar. Those barrels can be a bit tricky if you use their center for jumping, it seems using the solid corners of the barrels works best for me. Approach the barrel frontally by walking, there is no need for a pre-jump.
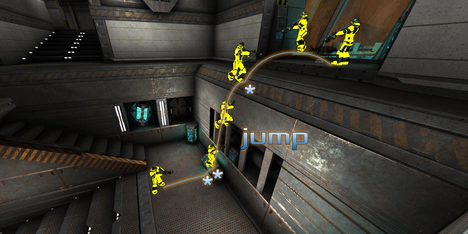
click to view full size -
From the stairs you can take a shortcut to the gangway where the Electro is by using that fancy object over here. This can be quite useful if someone is expecting you to take the longer but more obvious way through the Mortar room.
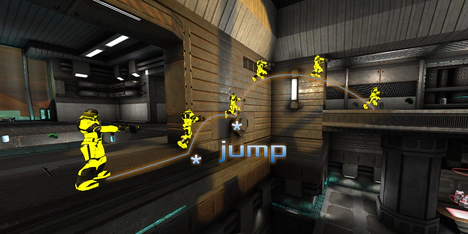
click to view full size -
The very same jump can be done from the Electro gangway up to the upper passageway near the Strength room. Using this jump enables you to avoid making suspicious noises by using the jump pad or the Blaster.
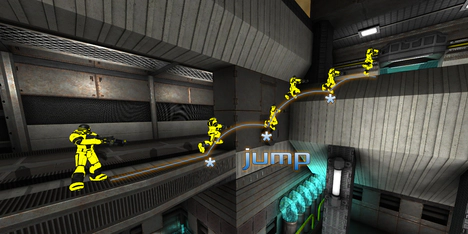
click to view full size -
A very nice trickjump is the one to the Mega Armor. You can do this one on both sides of the Mega Armor room. Remember to use the solid corner of the barrel. Walk up to the barrel and jump as you reach it, keep the jump button pressed, and use the little ramp on the pillar to push you right up to the top of the pillar. This jump is very hard to do on the fly out of a bunny hop, as you’ll probably be approaching the first ramp too fast which will boost you up too much to use the second ramp properly, so walking speed is recommended here.
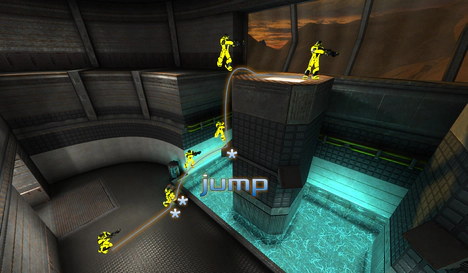
click to view full size
 Stormkeep
Stormkeep has a lot of easy ramp jumps, as its ramps are mostly long and therefore easy to bunny hop onto.
-
The first one is a very easy one, you shouldn’t have any difficulties with doing that one.
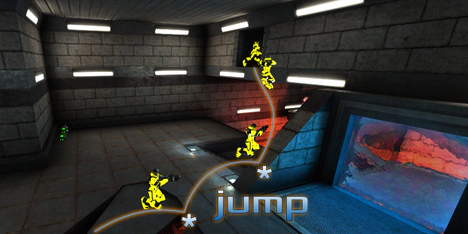
click to view full size -
Also the other side of the warpzone can be used as a ramp, though you’ll need a bit more speed to do this one, so gain some by a couple of pre-jumps.
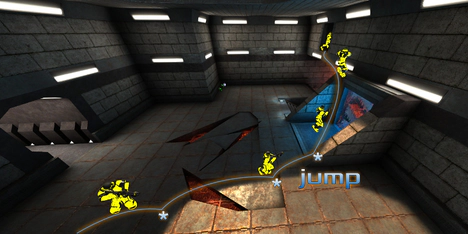
click to view full size -
Probably the most useful jump on Stormkeep. If you are too slow to make the jump directly to the Mega Health from the little platform beside the stairs leading down there, head to the right and do a ramp jump up the stairs as shown here. No need to take the longer route via the Small Armor shards, which are placed so uniquely that any experienced player can tell EXACTLY where you are when you pick those up in a row and could intercept you before you reach the Mega Health.
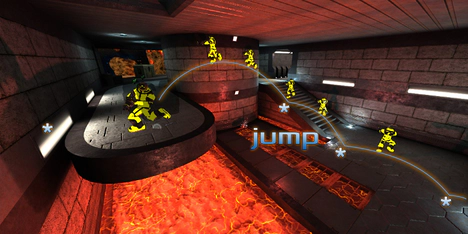
click to view full size -
This is a nice way to get to the top of the warpzone without making any noise in order to surprise someone that you expect to come through the warpzone soon. You’ll need quite some speed, it’s recommended to start pre-jumps in the tunnel system where the Small Armor shards are (below Crylink).
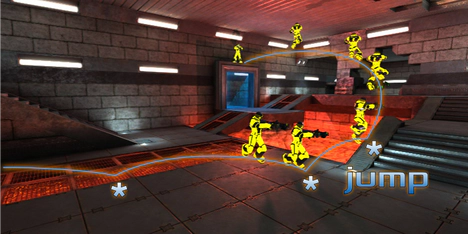
click to view full size
 Runningman
-
On runningman, you can use the very tiny ramp at the edge of the floor to jump up to the higher level where Crylink is placed. You’ll have to jump just before you bump into the wall in order to make it, it takes some practice but it is doable reliably once you figured it out.
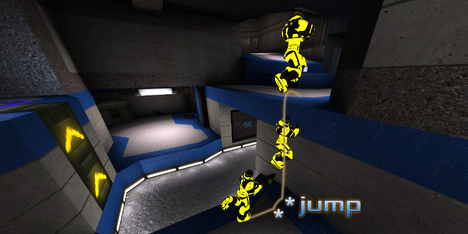
click to view full size -
You can bend the jump above so it takes you directly to the Mega Armor. However, this requires a lot of practice to reliably succeed. In-game I’d recommend to stick with the jump to the Crylink side and from there jump over to the Mega Armor unless you know for sure you’ve mastered the bended jump. I consider this jump the hardest one of all that I show you here.
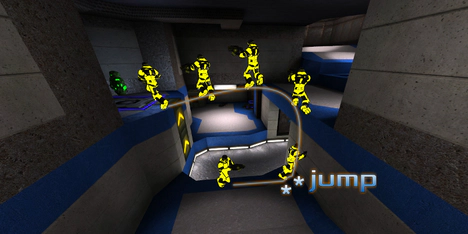
click to view full size -
The ledges at the Hagar also serve as ramps, you can use them for a double ramp jump from the lower level up to the higher one like this. Note that when you are doing this on the fly out of a bunny hop, you might even be able to skip the upper ramp jump as the first one will take you all the way up already if you have enough speed.
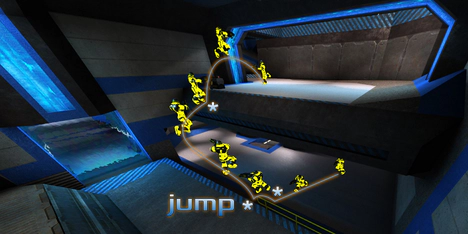
click to view full size -
This jump up to the Mortar works most reliably for me when I walk up to the ramp and jump just before I touch it. It’s the easiest way to get get up there without having to traverse the very open space or doing a Blaster jump (which makes noise).
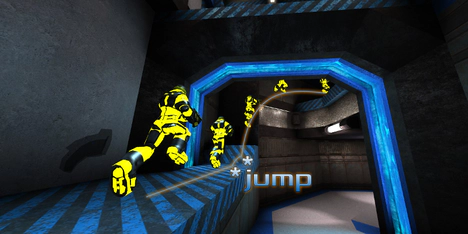
click to view full size
 Glowplant
Glowplant is so full of ramps that I don’t even know where to start. I won’t be able to display all of the possible ramp jumps, just a selection to give you the general idea where to look for what kind of ramps.
-
These lamps are all over the place. Here you can get to the Strength room. You might want to make a second jump on the broken tiles if you don’t get up in one jump.
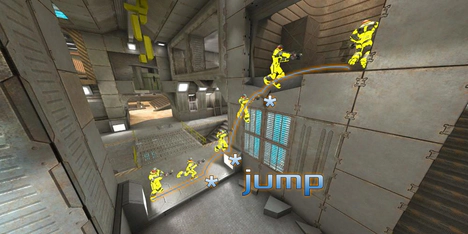
click to view full size -
If you turn around where you started the jump to the Strength you’ll find another lamp on the other side, and even on the jump pad side of the plateau below the Mega Health (as you see here). You can use either of them to get to the upper level just below the Mega Health without triggering the noise of the jump pad.
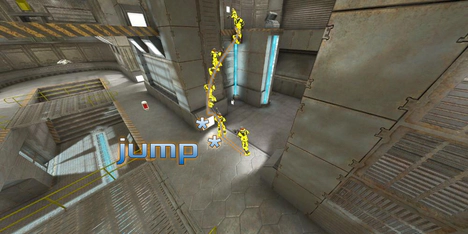
click to view full size -
From outside, you can also get to the plateau below the Mega Health if you use one of the ramps next to the jump pad. You might want to gain some speed by pre-jumping, though it is possible to make the jump more or less out of the stand.
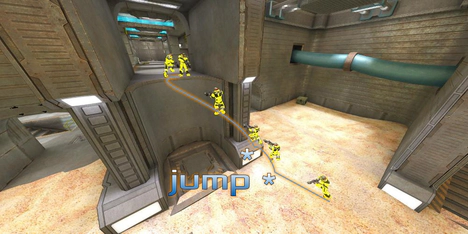
click to view full size -
To get from the level below the Mega Health up to it without triggering another jump pad noise, you can use this little ramp to jump onto the broken ladder, which you then can climb through the hole.
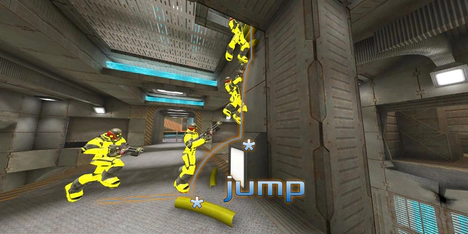
click to view full size -
From the Vortex you can use these little lamps to get to the Big Health on the pipe.
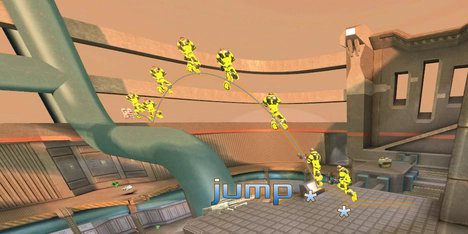
click to view full size -
From bottom level outside you can get to the Devastator using the broken pillar.
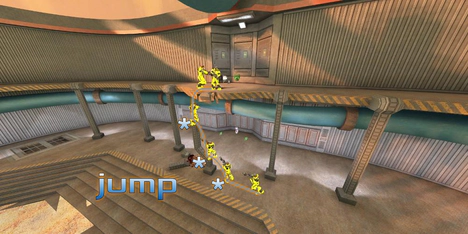
click to view full size -
This is a very nice ramp jump that’s essentially a double ramp jump with a follow-up ramp jump on the small pipe. You’ll usually land on the flat level of the pipe before hitting the pipe ramp, so it doesn’t really count as a triple ramp jump but still it is very useful in order to get to the Devastator platform without using the slow vent shaft.
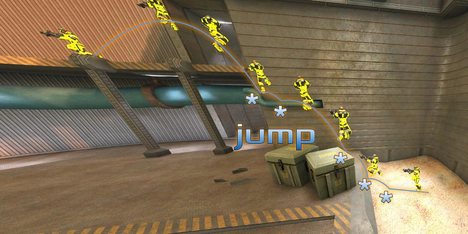
click to view full size -
Those handy little lamps everywhere… here you can use one to get to the Vortex level from the Devastator.
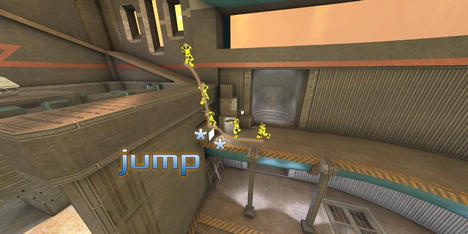
click to view full size
These are just a few examples where to find ramps on Xonotic maps and how to use them. Keep your eyes open for ramps and interesting jumps to do with them, as most mappers put some ramps at strategic places. Ramp jumping is a lot of fun and mastering this technique can give you a real advantage over other players!
Of course you can combine ramp jumping with Blaster jumping to gain an extra strong upwards boost.
 Weapons
Since we’ve now learned how to master Xonotic movement, it’s time to have a look at the weapons. I’ll go through Xonotic’s core weapons one by one.
 Blaster
I already explained the Blaster as versatile movement tool in the Blaster Jumping Section. Apart from moving yourself around, you can also use it for juggling around other players, irritating annoying campers or generally messing with other people’s movement. Pushing people around or forcing a prolonged bunny hop can be especially effective on space maps. Unless shooting at sitting ducks (such as campers), you might want to aim at your target’s feet to make use of its splash damage, as the Blaster projectile needs some time to travel even though it is rather fast, thus aiming at moving targets can be rather tricky.
The Blaster does not eat any ammo. Secondary fire will switch to the previously used weapon.
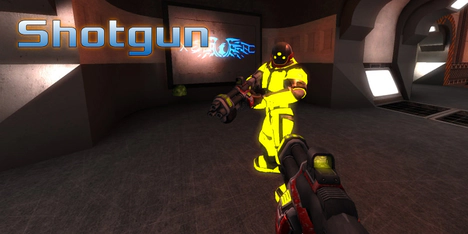
 Shotgun
The Shotgun is your second spawn weapon. Primary fire is very powerful in close combat and, due to the bullets’ spread and being insta-hit, a useful finishing weapon at medium range. Note that the push force of the primary fire will slow down targets moving towards you, which can be very effective on space maps at spots where players are supposed to touch down from distant jump pads. If you shoot them with the Shotgun while they are still flying, they probably won’t make it to their usual landing spot.
The secondary fire mode allows you to swing the Shotgun like a big trout and to slap other players, which is, apart from dealing rather lots of damage, very much fun to do.
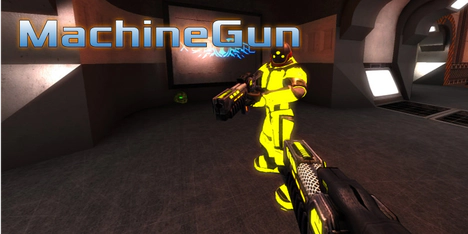
 MachineGun
The MachineGun’s (or “uzi’s”) primary fire has a high spread, so it’s useful mostly in close to medium range. Secondary fire has lower spread and shoots small bursts, which is more useful at medium to longer ranges. As the MachineGun projectiles have a little push force and are fired rapidly, it can be quite useful for slowing down players that come at you at high speeds. In fact, it’s hard to get into slapping range of someone that has a steady aim as long as such player is firing the MachineGun.
You’ll notice a ring around your crosshair that shows the depleting ammo. Once it is empty, the MachineGun automatically reloads. To avoid running around with a couple of bullets only and having to reload in the middle of a battle (which takes far too much time), you can reload the MachineGun manually at a convenient time by using the reload bind that you can setup, or by re-pressing the MachineGun bind while already wielding it.
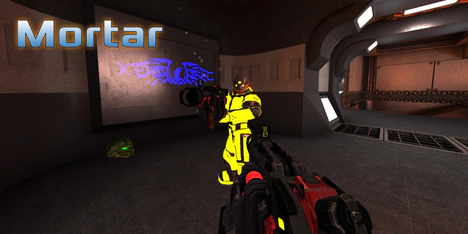
 Mortar
The Mortar fires ballistic grenades which deal a lot of direct and splash damage in addition to pushing the player away from the impact. Whereas primary fire detonates upon impact, secondary fire detonates exactly 0.5 seconds after the first bounce of the grenade. With this knowledge you can time the detonation of the Mortar’s secondary. The Mortar is a very effective weapon against any non-flying targets and to spam around corners.
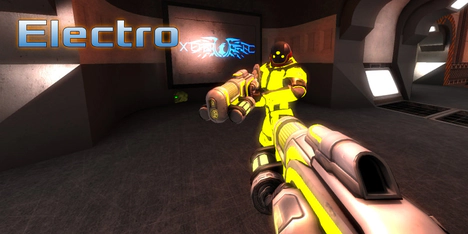
 Electro
The Electro primary behaves like an ordinary rocket launcher as you might know it from other games. However, it’s not really useful for doing high jumps. The secondary fire mode looks like some ordinary sluggish grenade-like balls, but has a not-so-obvious special function: if you detonate the up to three blobs the secondary fire mode can release with primary fire, they will explode with a big WOOOSH that deals a lot of direct and splash damage (around 130 dmg!). This makes the Electro especially useful for blocking entries, releasing upon several opponents that are busy fighting each other, or spamming where you predict someone to come. Note that you only have to directly hit the balls when trying to set it off mid-air, otherwise the splash of the primary’s impact on a surface nearby is sufficient to set off the combo-explosion. This means that you can even set it off through walls (shooting blobs around a corner then hitting a wall with primary) or even mid-air (just shoot through where your blobs fall).
 Crylink
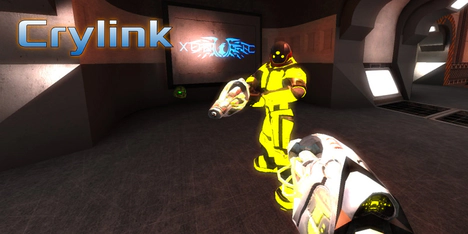
The Crylink has a couple of very non-obvious features, which makes this weapon rather interesting and unique. First of all, due to negative (!) push force, getting hit by Crylink particles will effectively slow you down very much, no matter of the direction you’re moving in relation to the firing player. Even if you move at insane speeds, getting hit by several Crylink particles at once will make you perform a full stop. This makes the Crylink very popular amongst defending CTF players, as you can really annoy fast flag runners with it provided you manage to hit them.
The latter can, however, be quite tricky, given the high spread Crylink primary has. Fortunately, Crylink has another feature that is very unlikely to be discovered unless someone tells you about it: when you release primary fire, the spread of Crylink primary will inverse. Let that sink in for a moment.
"When you release primary fire, the spread of Crylink primary will inverse"
Got it? This means that if you press the primary fire button, the particles will get fired with a certain spread. As long as you keep the primary fire button pressed, the spread will stay constant. Once you release it, the spread inverses, which means all particles traverse a single spot. Now the trick is to time the release so that as many as possible particles hit the opponent. The more particles you manage to land on the target, the more drastic the negative push effect will obviously be.
Crylink secondary does not have the spread inversion feature, the particles leave the gun at a very low and constant spread. The particles of secondary fire are faster than primary fire, and they don’t bounce. Their negative push force can be used on other players to break their movement (especially trick jumps) and even to pull them drastically if you manage to hit them in mid-air.
It wouldn’t be Xonotic if you couldn’t use the unique negative push force for movement as well. If you start a bunny hop and, just when you started to go up from your first hop, hit the floor with Crylink secondary at about an angle of 45° in front of you. The negative push of the implosion in front of you will catapult you forward. This (“Crylink running”) is probably the most efficient way to gain speed from stand. You can also use it to climb walls if you face a wall, jump, and shoot the wall above your head with Crylink secondary. Crylink climbing is also the most effective way to save you from falling off maps, provided there’s a wall close by.
 Vortex
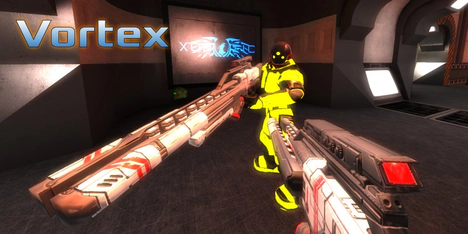
In the hands of a player with a good aim the Vortex is probably the most powerful weapon in the entire game. It fires a single beam with zero spread that will instantly hit anything in its way and will even shoot through other players. You’ll notice a small ring around the crosshair when holding the Vortex in your hands. If the ring is full, the Vortex is charged (and also starts to glow red). Charging happens automatically while you hold the weapon, and it does not cost any ammo. Upon firing, the Vortex obviously discharges and starts to recharge unless you switch to another weapon (which you should do, but more about weapon combos later). When fully charged, the Vortex deals 80 dmg, if you shoot with it immediately again, it deals 76 dmg, minimum damage you can deal with it is 59 (if you switch to another weapon immediately after shooting and then shoot Vortex immediately after reswitching back to it, so it doesn’t have the refire time for recharging).
Secondary fire only zooms in, as the weapon is strong enough as it is even without a secondary fire mode.
 Hagar
Hagar
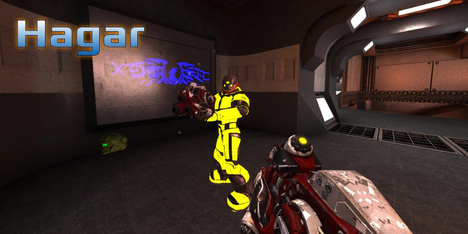
The Hagar rapidly fires small rockets without spread. By holding secondary you can load up to 4 rockets that you can fire simultaneously in a three-tip-star formation by releasing secondary fire. If you hold secondary fire too long, the Hagar will make a little beep and automatically release the loaded rockets, so you can’t just run around the map keeping the Hagar loaded all the time until you find someone. Unloading the Hagar secondary can deal a lot of damage at close range, however you’ll need to watch out not to get killed yourself by the splash damage it does. The high splash makes this weapon quite useful against opponents standing next to a wall so the rockets that miss will at least do splash damage. Since the projectiles have no spread, the Hagar can also be used at long distances, but the long travel time of the projectiles makes it tricky to do this effectively. On most competitive servers you’ll be able to discharge the Hagar secondary without firing the rockets by pressing primary again while still holding secondary, but normally doing this will cancel the loading and empty the Hagar.
 Devastator
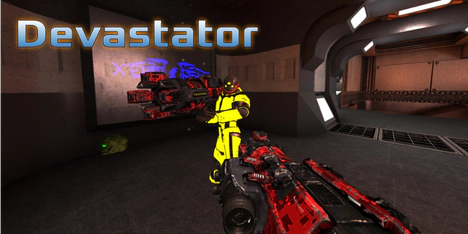
The Devastator also has some very interesting features that are not very typical for this kind of weapon. First of all, you can use the secondary fire to immediately remotely detonate any rocket you fired (provided of course it is still flying). No need to hit a flying target directly, just get the rocket near and, BAM, there you go. Apart from the high splash damage, the explosion also deals quite a lot of push force, so if you want to push some flying player off the map, the Devastator is your weapon of choice.
But not enough, you can of course also use the Devastator to push yourself around. If you happen to be flying and need some extra acceleration but there is no wall near to Blaster yourself off, just shoot a rocket downwards and immediately detonate it. Yes, it hurts. A lot. But it might be worth it, be it to push you back onto the map if you are falling into the void or to prolong a Blaster jump so you manage to reach a distant location. This technique is called “rocket flying.”
You think I’m already done with the Devastator? Not yet! In addition to this already very useful feature to remotely detonate your rockets you can also guide the rockets. Just keeping the primary fire button pressed and moving the mouse enables you to do some interesting stuff which can come in very handy in all sorts of situations.
Of course you can combine rocket guiding and remote detonation.
 Gameplay Tricks
Now that we’ve been examining movement and weapons, the air for new newbie stuff is starting to get thinner and thinner. In this section I’ll be providing some general gameplay hints that hopefully will make your life as a newbie out there on the servers easier – and longer :)
 Weapon Comboing
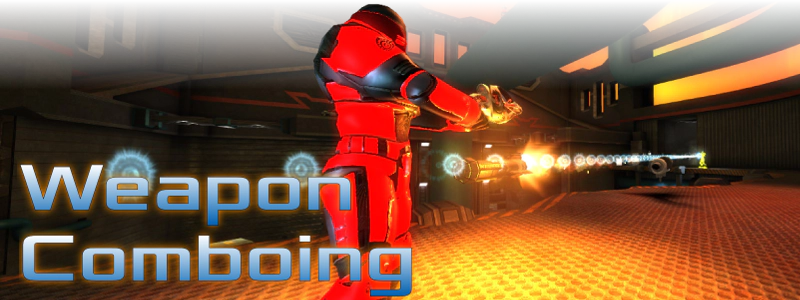
First of all, Xonotic encourages the usage of weapon combos. How so? Well, if you shoot, you will have to wait a short while (the refire time) until that weapon is able to shoot again, unless you’re holding a constant or rapid fire weapon (only Hagar and MachineGun of the core weapons). The refire time is rather short so it doesn’t feel like limiting you much if you’re not aware of the concept of weapon combos. But if you switch your weapon immediately after you shoot, you can land a second shot with the second weapon faster than you would be able to with a second shot of the first weapon, as the refire time is longer than the weapon switch delay. This way you are able to deal more damage per second by combining different weapons. Additionally, combining weapons also enables you to combine the specific benefits of two weapons, like slowing down a fast target with the Crylink in order to be able to easier finish them off with an insta-hit gun such as the Vortex.
 Keyboard Setup
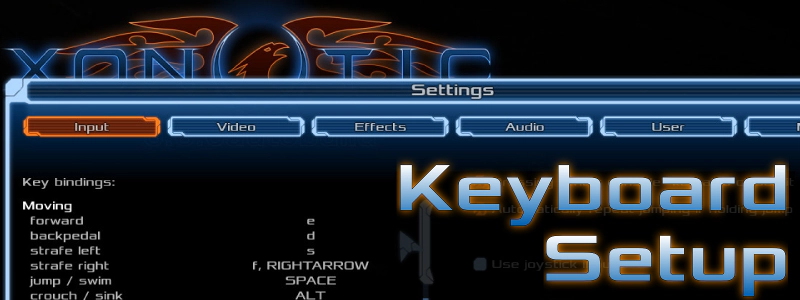
This leads to the problem that it’s terribly difficult for any orthopedically healthy and sane person to do weapon combos efficiently and reliably with the default keyboard layout or (omg!) the mouse wheel. Fortunately, Xonotic allows you to re-configure the entire keyboard bindings very easily (Settings → Input). I consider direct weapon binds per weapon the easiest way to access any weapon immediately, and would strongly recommend placing the relevant binds around your movement keys or on extra mouse buttons your desktop rodent may have. You will have to find a solution that feels comfortable for you, which might require some experimenting. I for example moved my movement keys from WASD to ESDF in order to have more keys available around my movement keys for weapon binds. But that’s just an example, you’ll have to find out what works best for you.
Don’t worry, impacts on your playing skills that result from redesigning your keyboard layout will, once you’ve found a comfortable setup, be only temporary and the change WILL pay off in the long-run. Being able to pick the right weapon for the job instantly by means of a finger reflex is a great advantage in a FPS that is as fast paced as Xonotic.
 Splash Damage Travels Through Walls
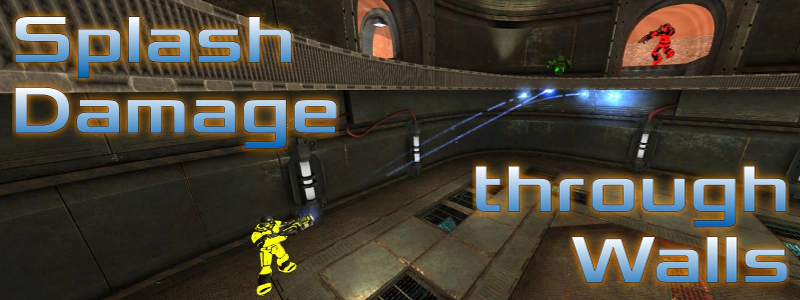
Another thing you should be aware of is that splash damage travels through walls. Knowledge of this fact can come in very handy at various situations. Especially if you know or suspect someone to be on a higher level above you and the ceiling is thin, you can just try a lucky Mortar or Devastator shot at the ceiling. The hit indicator sound (that little beep) will tell you if your guess was right. If you’re very confident about the location of your opponent, you can even unleash an Electro combo (see the weapons part above, Electro) at the ceiling, which works surprisingly well and does a great amount of splash damage, but takes a bit more time to do.
Using splash damage through walls is a very useful and secure technique, as the opponent will obviously not be able to fire back at the same time.
 Stay Healthy
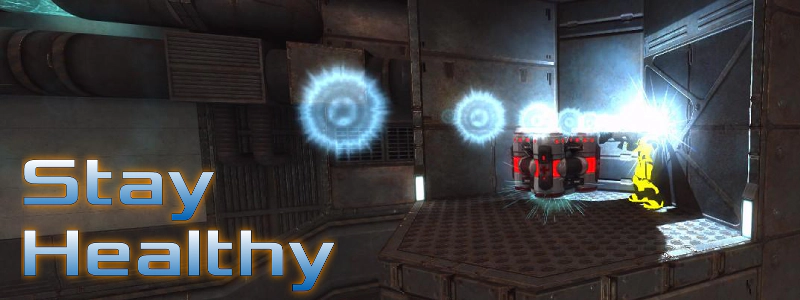
This is something which is almost too obvious to be included here, but I’ve seen so many new players running right past health and armor pickups without taking them. In Xonotic, your starting health of 100 can be brought below zero very quickly. It takes any experienced player two shots to accomplish this, which typically are a two weapon combo so this goes really fast. If one player can finish you off that fast, imagine how long your life lasts in a typical eight player deathmatch. This is why it is absolutely crucial to pick up any health and armor you might find on your way, unless of course this puts you in a dangerous position that outweighs the advantages of a health/armor boost. A Mega Armor or Mega Health gives you an additional 100 health or armor points respectively, which obviously equals the amount of damage you can take with your starting health – you could consider a Mega Armor or Mega Health an extra life. Megas respawn within 30 seconds of being taken.
However, note that if you are above 100 health/armor, both health and armor will start to rot down to 100 a short while after you picked up your last health or armor respectively. The higher above 100 you are, the faster the rot goes. On the other hand if you are below 100 health, your health will start to regenerate a short while after you took damage for the last time. Again, the lower your health is, the faster it regenerates. This means if you get out of a battle with really low health and there is no health pickup anywhere near, it can be a good idea to retreat to a place out of action until you manage to regenerate a bit. Armor obviously does not regenerate.
 Listen
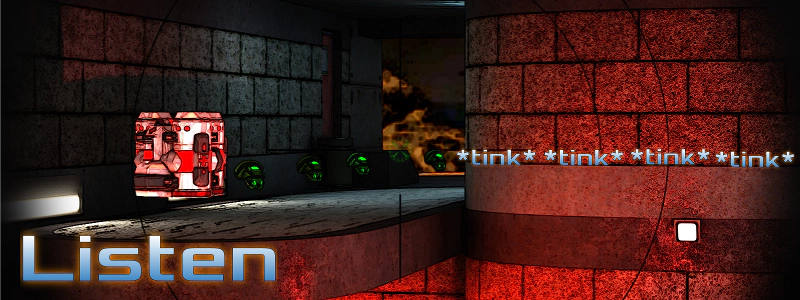
The fewer players you have in a match, the more important it gets to listen to the sounds they make. Each armor or health pickup size has its own distinctive pickup sound. Pickup sounds are louder and therefore easier to notice even at some distance than footsteps. If you know where which pickups are on the map you’re playing, you’ll be very often able to know where other players are before seeing them just by listening to the pickup sounds they make.
Also note that the sound a player makes when getting hit varies depending on how low that player’s health is. When you hit a player and you hear the characteristic “very low health groan” (most newbies know that sound primarily from their own player model… :D), you’ll know that you’ll only need to deal a few damage points to finish that player off, so you can go for fast high spread (MachineGun, Shotgun) or fast splash damage weapons (Crylink). Listening is an essential part of duel gameplay.
 Console ABC
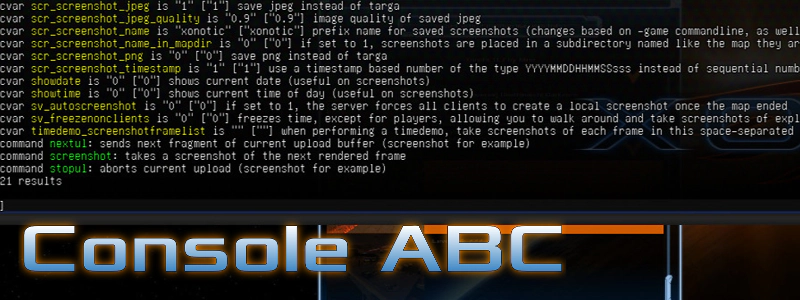
Though the Xonotic menu is very powerful and offers almost every option you could wish for, sometimes it is faster and simpler to change settings via the built-in console. You can open the console by pressing <Shift> <ESC>. Now you have a command prompt where you can query and change settings or execute commands. If you already know how a command you are going to type is called, you can just type the first few letters and hit <TAB>. This will automatically complete the command. If the letters match several possible commands, it will auto-complete to the extent all potential completions match and show you all potential completions. For example, typing cross in console and hitting <TAB> will auto-complete to crosshair and show the commands like crosshair, crosshair_alpha, …. If you try this you will notice the console will show you not only the possible command completions, but also more info to each possible completion: what is its current (local!) setting, what is its default setting (in square brackets) and a short description what the command does.
In most cases you won’t know the exact command to type, and this is where a special command will help you: search. If you, for example, want to know how to do change screen resolution, you can just type search resolution into the console, and it’ll spit out all commands with description that have the text “resolution” in their name or in their description.
A very important and widely used console command is the command to call a vote. If you want to see what votes are allowed on a server, type vhelp. To call a vote (for example, to end the match), type vcall <vote> (in my example vcall endmatch).
If you’d like to know more about the Xonotic console, check out BlaXpirit’s forum thread about console tips and tricks. In case you find consoles a little too nerdy, you can change game settings in a similar detailedness also via the “Advanced Settings” dialog located in Settings → Misc. The search function there works just like the search command in the console.
 Optimizing Perception
Xonotic aims to be pretty and to offer an immersive gameplay experience by using realistic lighting, complex particle effects, and a harmonious sound environment. While all these elements may help you dive deeper into the game’s atmosphere, they also provide an overhead of information for you to process that sometimes has no use other than creating such atmosphere. In some cases this can even lead to gameplay-relevant information getting lost under such overhead. This section deals with configuring Xonotic so you can see and hear well at the cost of atmosphere (a lot of which will get lost in the process).
To apply the tweaks I’ll resort to showing console commands mostly, simply because it is much shorter to just show the command here than to describe the menu path where to set the relevant configuration option. So be sure to have read the Console ABC section if you’re not already familiar with the Xonotic console.
 Visuals
First of all let me state that I myself usually play with more or less regular settings because I like to experience the great work developers, modelers, and mappers have done to create decent graphics. But if you intend to play competitively, it can be to your advantage to lower the complexity of what is displayed in order to be able to fully focus on the information that is relevant for your gameplay. In this section I will try to point out a couple of settings that can help reduce complexity while maintaining all relevant information. Be warned though, if you follow all suggestions contained in this section your game will look pug-ugly to say the best.
 Damage Blur
The first thing to do is to disable the damage blur. Getting hit is already bad enough, you won’t want to punish yourself with temporary blindness additionally. This is so crucial that I even disabled this “feature” in the left screenshot above in the “Visuals” caption, otherwise you wouldn’t have been able to see a thing there. If you haven’t done so already, disable this by doing
hud_damage_blur 0
While we’re at it, we can also reduce the damage flash when getting hit:
hud_damage 0.4
 Field of View
It obviously is crucial to see what is happening around you. To increase the area that you can see, adjust the field of view to your liking. While the default value is at 90°, I personally play with a field of view of 120°, and find this a quite usable setting. Remember though, that changing the field of view has an impact on your ability to aim, very similar to changing settings of your mouse sensitivity. The higher the field of view, the harder it can be to aim. I have a lousy aim anyway, so I can play with FOV 120° alright. You can change the field of view in the menu or via console with:
fov 120 (adjust to your liking)
 Visible Players
Most player models are really hard to spot, as they are optimized to look good and, to some extent, realistic. This means their textures are subject to the usual rendering procedures which calculate how much light from the surroundings will be reflected by the player models. Consequently, most models are hard to see in dark corners, and don’t have a strong contrast to the background in general. There is one model though that uses “fullbright” textures, which are always displayed at full brightness, and this is the “Mega Erebus”. With 0.8.2, first steps were taken to add fullbright skins for each and every model, in the course of which the “Mega Erebus” got removed (a bit too early) from the model selection menu. As a consequence, you cannot select it via the menu for the time being, so you’ll have to use the console for that, as it’s still available.
playermodel "models/player/megaerebus.iqm"
Now there is a way to make every other player be displayed to you as “Mega Erebus” even if they selected a different model, and you can do that by selecting it for your own player and forcing your own model on everyone. This can be done via the menu, but here’s the console command:
cl_forceplayermodels 1
Be warned though that the sounds other players make still remain the same, so don’t be shocked if a Mega Erebus is commenting to you in a Pinky Pie voice on servers that have ponies enabled. If you dislike other people using colors that may blend too well into the map, you can also select a particularly bright color for yourself and force it onto everyone as well:
cl_forceplayercolors 1
These settings obviously have the disadvantage that you become extremely visible to everyone else, too – but it would be rather unfair if you could make everyone extremely visible while staying a grey mouse, wouldn’t it?
 Reducing Effects
I personally strongly dislike blood splatter and gibs flying around as a matter of taste, but disabling all the gory mess also has visual advantages beyond personal preference. The more unnecessary detail that gets rendered, the harder it is to filter out the information that is actually relevant. Therefore, turning off gibs is a good way to get rid of a whole bunch of effects that only get in your way if you want to keep an overview in the heat of a fight:
cl_gentle_gibs 1 (note that you may need to restart Xonotic or reconnect for this change to take effect)
But not only gibs can obscure things, also particle effects of explosions, coronas, and bloom can impact visibility:
cl_particles_alpha 0.2 (feel free to experiment with values between 0 and 1)
cl_particles_sparks 0
cl_particles_blood 0
r_coronas 0
r_bloom 0
 Picmip and Simple Items
Now the game still looks somewhat ok-ish. Time to change this! Let’s get rid of all those details in textures that generate contrasts where it isn’t needed:
gl_picmip_world 10
gl_texturecompression 1 (if you like, or need faster loading)
What, still looks the same? Well, then do
vid_restart
and enjoy :D
Some people even like to replace the beautiful pickup models with 2-dimensional bright sprites. I personally don’t see a visibility benefit, but the bright symbols could be considered as easier to spot. To enable “simple items,” do:
cl_simple_items 1
You will have to reconnect to the server (or, if you test it in a local game, type restart in console). Note that this change only works on servers that allow this setting to be used.
 Crosshair
The next thing is to set an always visible crosshair. Though I personally like the per-weapon crosshairs, they unfortunately are not very bright. With them, I often had the problem of identifying where that crosshair actually is in the middle of a battle. Even though I probably ended up landing quite some hits this way due to my particularly fuzzy aim which seldom places the crosshair on the target, I decided to make the crosshair really visible, now that I deliberately chose to use the darn thing. You can very comfortably configure the crosshair via the menu or just copy my settings:
crosshair 27 (this is really all about personal preference)
crosshair_alpha 1
crosshair_effect_scalefade 0
crosshair_effect_time 0
crosshair_enabled 2
crosshair_dot 1
crosshair_dot_color 0.24 1 0.13 (this too is all about personal preference)
crosshair_per_weapon 0
crosshair_color_per_weapon 1 (if you like to know the weapon per crosshair color)
crosshair_ring 0 (this removes the Vortex ring, keep it if you like to see it)
crosshair_ring_reload 1 (mg reload ring might be useful)
crosshair_ring_reload_size 1 (adjust to your liking, default is too big imho)
crosshair_size 0.28 (adjust to your liking)
 Fine Tuning
If you have already set up weapon binds following the instructions above and are really confident about them, you might even choose to remove the rendered first person weapon model so it doesn’t block your view:
r_drawviewmodel 0
Now you’ll only know what weapon you hold by remembering the bind you pressed last and by the color of the crosshair. But if you managed to get the weapon binds into your cerebellum, this is manageable – decide for yourself if you’re ready for this. I started using this setting when publishing the Newbie Corner #6, and felt very comfortable with it for already quite a while.
When using the zoom to improve sight in a fast paced game like Xonotic, you won’t want the view to be impaired by some mask around the crosshair that generates the impression you’re looking through some binoculars or something:
cl_reticle 0
Also, who wants to waste time for the transition between zoom and non-zoom?
cl_zoomspeed -1
Ever since I configured a dedicated zoom key that I can use on all weapons (you can do so via the Menu, Settings window, Input tab), I got annoyed by the zoom getting lost upon switching the weapon, which results in loosing your aim just when it is crucial to hit. You can disable this by doing:
cl_unpress_zoom_on_weapon_switch 0
Bobbing effects are generally only for conveying a “realistic feel” and don’t serve a purpose that’s important for the gameplay. Quite to the contrary, they make your view less steady, so you might want to switch off all sorts of bobbings:
cl_bobfall 0
cl_bobmodel 0
cl_bobup 0
If you like to keep an eye on the action (and on who takes which items) when you get fragged, you can disable automatically showing the scoreboard when dead with:
cl_deathscoreboard 0
 Audio
Audio
Apart from all the visual stuff, you can of course also improve perception by adjusting the audio settings. While there is quite some remarkably good music in Xonotic, in-game music can distract you and predominate pickup or movement sounds that you might want to hear. The same goes for ambient sounds. While these greatly add to the atmosphere of the game, they can prevent you from predicting where an opponent will come from, what the player’s approximate health status is, and what is being picked up. So if you can do without the atmosphere, you might want to turn those off via the menu.


